© ericdentinger.com
2008-2026


Eric Maclewis - BAGPIPE SOUNDS
Eric Maclewis


SINGLE GRACE NOTES: G - D - E
Simple in appearance, the proper execution of these grace notes is the basis of the future practice of more complex ornaments.
Some preliminary remarks:
- each grace note must be placed precisely on the beat, which means that when we close the movement or the finger of the grace note "taps" the practice, we must be on the beat.
NB: in more elaborate rhythmic movements, it can be placed between two pulsations, we will come back to it.
- G grace note: composed of two movements (apart from what happens on the melodic note) =
1. we raise the High-G finger to make the G heard in a way
2. we rest it on chanter (we close the movement) and at the same time as the beat.
…

PRACTICE CHANTER - PAGE 2
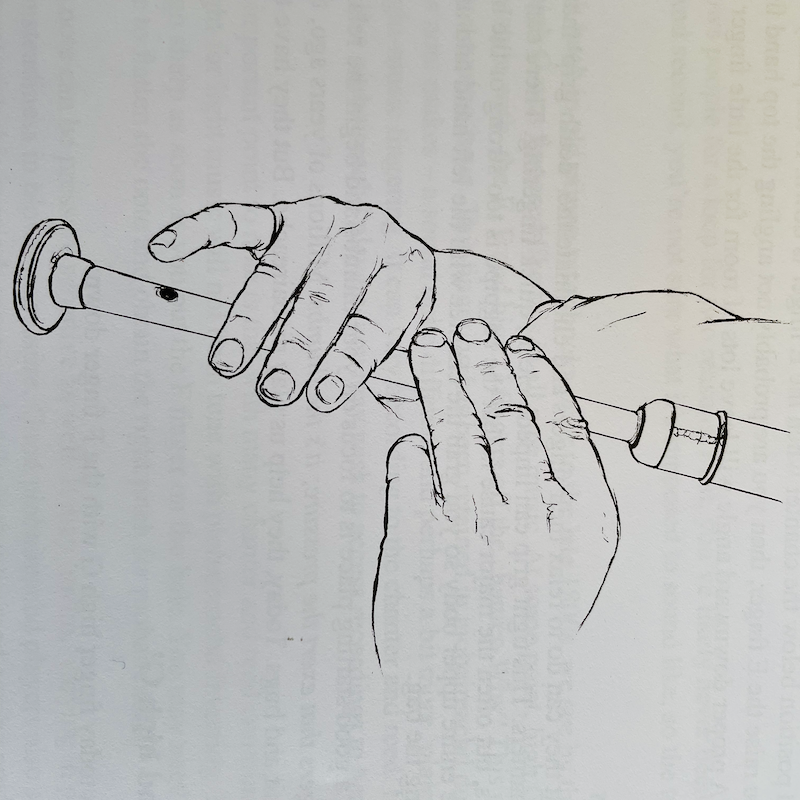
Let's start by putting our fingers on the practice chanter.
Observe and replicate these two diagrams and in particular the bevelled position of the upper fingers as well as the use of the second phalanges for the lower hand (pic. James McGillivray):
If you use a traditional (non-electronic) practice:
MANAGING AIR PRESSURE
Many exercises with the practice are disturbed by the pressure exerted on the instrument.
Of course there is pure acoustic pressure that can cause a strong pressure on the lips which tend to tighten the tip of the practice too much, a bit as if we were afraid to let go of the instrument...
This tension of the lips will be partly caused by the type of reeds used, some being harder than others.
Major Corollary:
Oral tension will be transmitted to the fingers, especially to both thumbs.
Pay special attention to them and you will see that they are the ones who exert the strongest pressure on the practice and that this unnecessary force is transmitted to the other fingers.
Tip: control and reduce this thumb-pressure.
Easier to write than to do, isn't it? But awareness is the basic step.
Also try to reduce mouth pressure and to reduce your stress.
Also question the tempo chosen for the exercise: it may not be adapted to your level of the moment; so do not hesitate to reduce it as long as it takes!
Also remember to be methodical and progressive in technical difficulties, one step at a time!
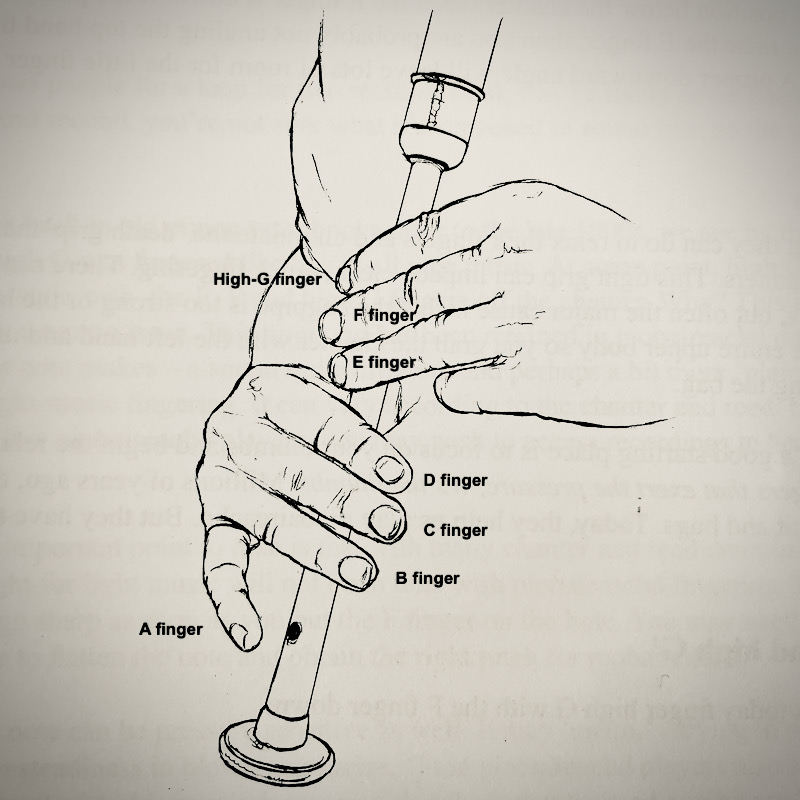
About the name of the fingers on the practice: see diagram
(naming the fingers will be useful in understanding the movements related to the ornaments)
A finger = matches with the A note
B finger = matches with the B note
C finger = matches with the C# note
D finger = matches with the D note
E finger (upper hand) = matches with the E note
F finger = matches with the F note
High-G finger = matches with the High-G note
High-A finger = matches with the High-A note = upper hand thumb